My Dactyl Keyboard
Introduction
Dear Blog,
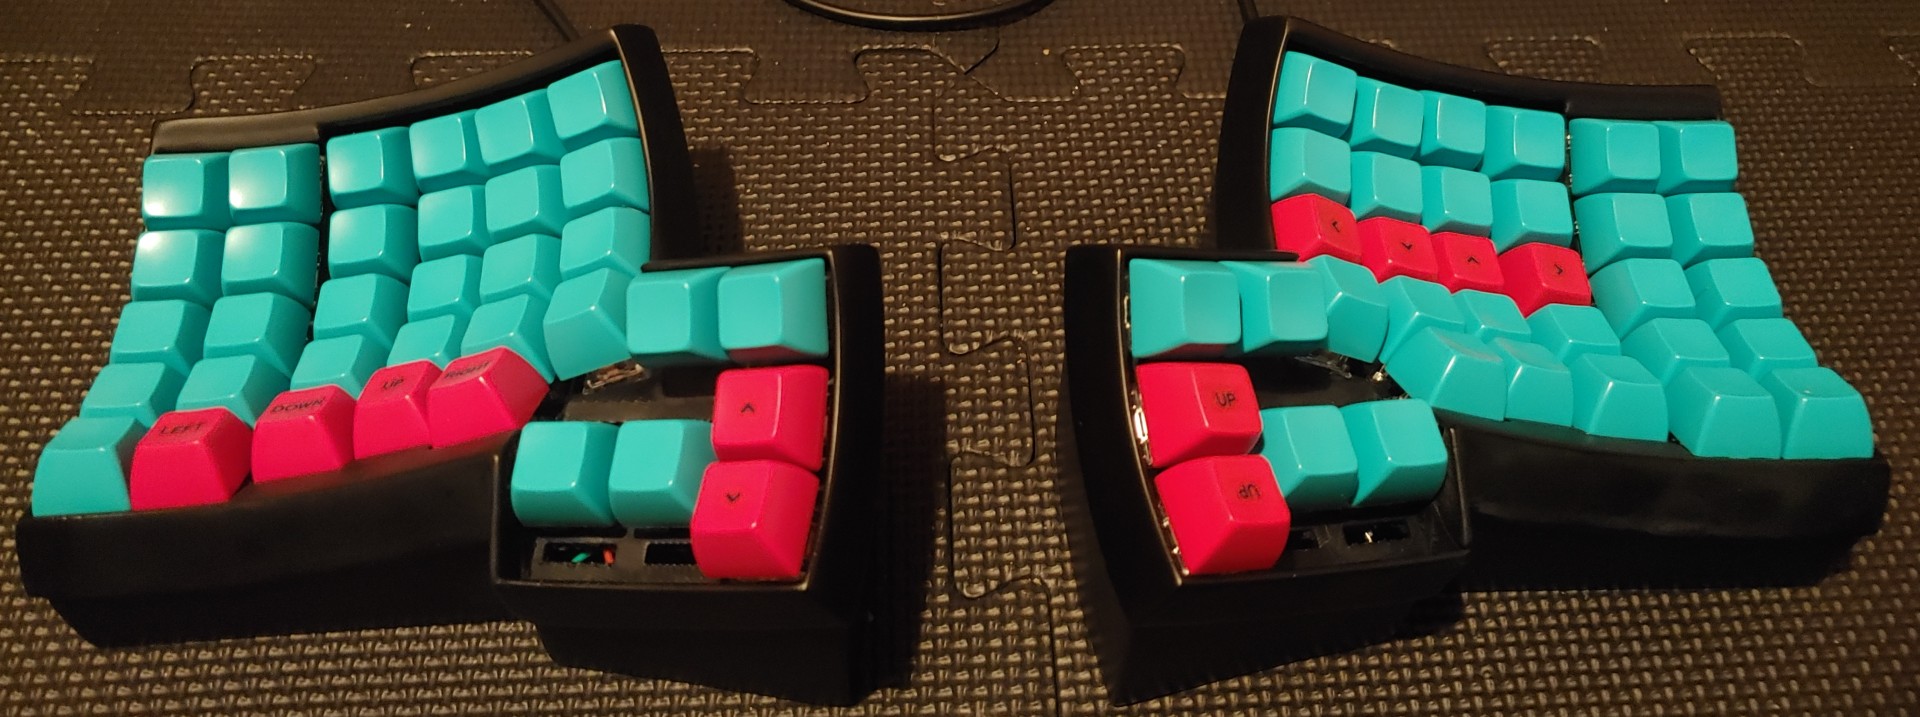
I am currently typing this post at 6 words per minute on the dactyl keyboard I built.
 (disregard the missing 2u keycaps in the front, I forgot to order them)
I'll probably get more used to typing on it as I practice my touch typing and get back to my average 100wpm, but at the moment this feels like torture.
I'm not going to go through my entire process of building this keyboard as there are plenty of guides out there that contain about 95% of what you need to know in order to build one yourself (I'll link the ones I used in the references section of this post). Instead, I'll try to fill in some of the gap that other posts didn't go into much detail about. Hopefully if you read this you'll avoid some of the mistakes I made and save yourself alot of time and effort in making your project.
Advice
-
getting a good looking case can be pretty hard
I can't comment too much on the case printing process, as I ordered my case from an online 3d-print for hire. One thing I will say is that having my case printed using PETG was likely a mistake. When it comes to 3d printing materials, it's usually a choice between PETG, ABS, and PLA. PETG is the sturdiest of the 3 and so is usually the choice for dactyl keyboard cases. However, many of the dactyls people make are not made to look like a high-quality keyboard and as a result they might've not run into the same issues I did when building, which could've been avoided had I gotten an ABS case instead. The big issue with PETG is that it's very difficult to sand. In particular, PETG does not have an easily-obtainable chemical that can smooth it down. Chemical vapor smoothing takes very little time to do, while as wet sanding (in my case) took more than all the other build-time combined in order to get a satisfactory result. I had to sand 6 different parts with 200, 400, 600, and 800 grit sandpaper, then paint each part with 3 coats of rustoleum filler primer, fill in any imperfections with sculpting clay, sand each part again at 1000 grit, and finally top it off with a matte acrylic spray. Had my case been printed using ABS, I could have cut my build time in half. The sanding work was so daunting to me that I spent a year procrastinating on building this keyboard.
Another important note on getting a good looking case is use decent-quality matte spray as the topcoat. Unless you think your case is going to turn out perfect, using a matte spray is an easy way to make imperfections less visible when further than a few inches away and give off the impression that your dactyl is flawless. I'd include pictures of this from my build but won't because my build is flawless. :)
-
wiring is 90% prep and 10% soldering
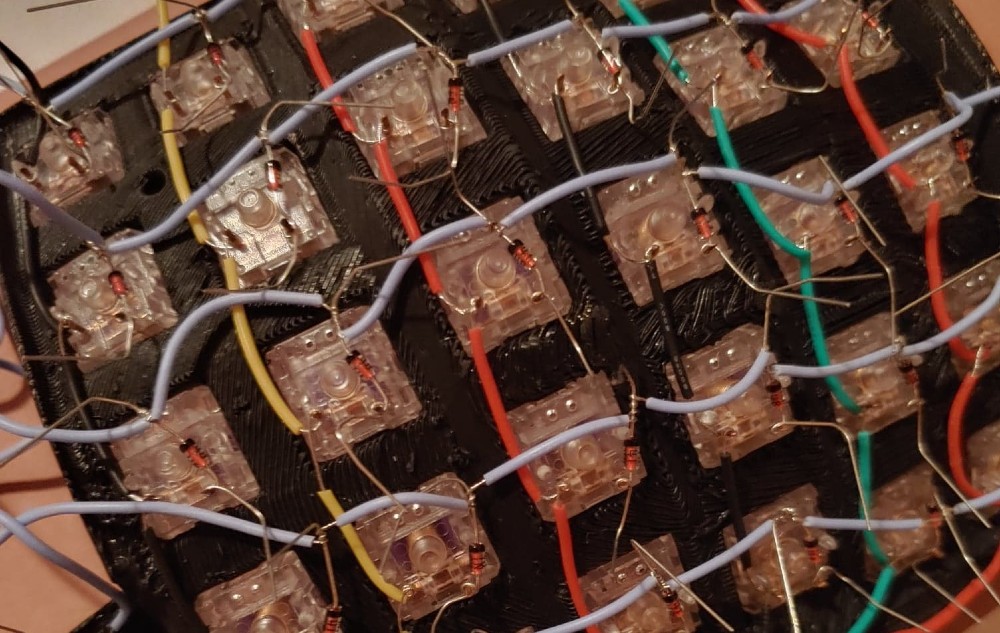
In my opinion, the difficult part of the build has already passed if you're wiring your matrix to the switches on your ready dactyl case. That's because most of our soldering is done between wires and not on a PCB, meaning we don't have to be very accurate with the soldering so long as we're connecting the wires together well. To make things somewhat easier, I wrapped each wire around the target location using the cribbit-wiring strategy:

As you can see, following this strategy made it so I could complete the entire build without even needing to solder anything. Once I got around to the soldering stage, it was just a matter of touching each joint with some solder to keep everything in place. Frankly, I wouldn't be surprised if you could do this entire project with a glue gun instead of a soldering iron, because that's basically all the purpose the soldering iron served.
-
how the keyboard works
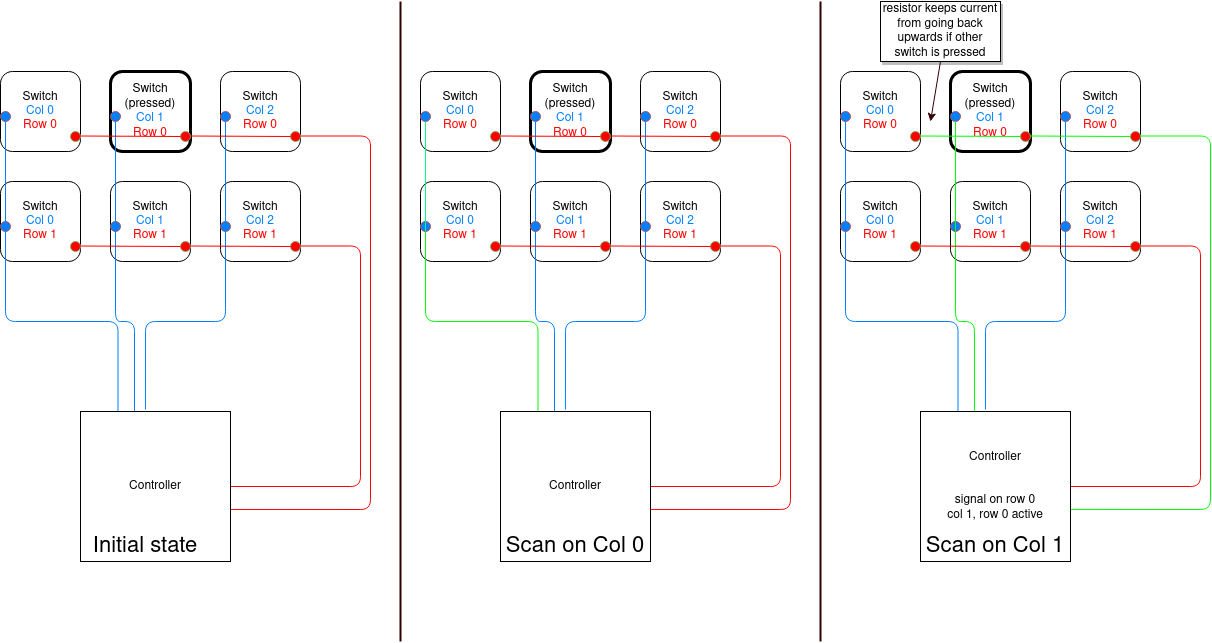
One thing I noticed many guides left out was how does the keyboard actually work. A brief explanation here will hopefully make things more clear as to why the dactyl and keyboards in general are wired the way they are. The microcontroller that you have inside your keyboard is flashed with a firmware that sends and receives signals through it's general-purpose input output (GPIO) pins. Many times per second, the controller will send a charge through one of the pins corresponding to either rows or colums in your wiring (depending on how you wired it), while listening for signals coming in from the pins it does not send signals to (this is known as scanning). As an example, if the controller sends signals to the columns then it will listen for signals coming in from the rows. All a keyboard switch is comprised of is essentially some non-essential stuff to make the click feel good and some metal contacts that only touch when the switch is pressed. When the controller sends a signal to the pin for a specific column, one of the metal contacts in every switch wired to that column is now carrying that signal inside of it. When a switch in this column is pressed down, it causes the 2 metal contacts to touch. The other contact, which is wired to its switch's row, will now also have a signal running through it, causing the row wire and the pin it was attached to also have that signal. Since the controller received a signal from some row at the same time it was scanning on some column, it now knows that the key in the given row and given column is pressed down. I've made a small diagram below to illustrate this. Hopefully this makes it more clear as to why you need to do what's in other guides, and what's actually required in building a custom keyboard.

(my hands and brain are exhausted from typing so the level of detail is probably about to drop off very hard.)
-
glue down your switches
don't be an idiot like me and think you can get away with leaving your switches held in by the 3d print. If you ever decide to take off your keycaps or take your dactyl around, it's going to be annoying since you'll always be worried about ripping the matrix out. Not to mention that any issues inside your keyboard means you'll have to unscrew the screws lying under the keycaps, which means removing the keycaps first. Glue them down as soon as you start wiring so you don't have any regrets later.
-
test often
As soon as your board is ready to be tested, test every row and column to make sure everything is working. I had several random issues during my build, like 2 exposed wires combining 2 of the columns together or the wire for a row getting chewed through when inserting screws. It's better to spend a bit of extra time testing between steps than it is to try speeding through everything and then having to destroy your own work in order to fix the issue.
-
picking up a dactyl is easy
From the 2-3 hours since I started typing this post, my wpm has already reached 50! I'm still making alot more mistakes than before, but I can also tell I'm getting to the point of tolerability very quickly. It makes sense that I would, since the majority of layout change was in the modifier keys and special characters, of which very few of those were needed for this text. By next week I'll likely be completely used to this board.
That concludes my tips on building a dactyl. I've left a list of resources below which will hopefully make your building experience easier.